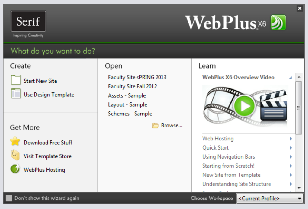

Start the WebPlus X6 program, the Startup Wizard dialog box appears as shown below.
Click on the picture below “WebPlus X6 Overview”. Your browser will open and display the home page for the tutorials for WebPlus X6 as show below.
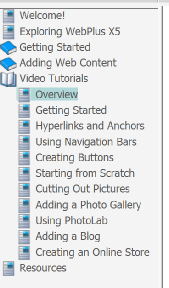
Click on the book icon in front of “Getting Started
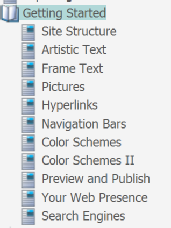
In the “Getting Started” then click on Pictures. Complete the Pictures tutorial.
See the notes below for additional information to help complete this tutorial.
Notes for Lesson 3 Pictures
Before you start you may want to zoom to page width to see better.
Read the note after step 2 this is the path to the images, you may have to use that path to find the images. If you have a 64 bit operating system you will see a folder Program Files (X86), this is the folder you will open to find the images.
When you are asked to save you work save this web page as Picture Sample.
When you have finished with the “To recolor an image:” section you can go back to
the full color image by selecting the picture, clicking on the Re-
You should always add an alternate text to an image. This will allow people to read a title for the picture you add to your site.
When you have finished the tutorial review “Saving Images From a Web Page” and Saving Images from an Image Search” at the top of this page, complete Project 3 Image as described in the link at the top of the page.
Date modified 12-
| CIS 112 Home Page |
| CIS 114 Home Page |
| CIS 147 Home Page |
| CIS 221 Home Page |
| CIS 112 Class Calendar |
| Using the D2L Dropbox System |
| Educational Goals and Objectives |
| Projects |
| Using the D2L System |
| Project 3 Excel |
| Project 4 Working with Images |
| Project 5 Creating a Slide Presentation |
| Project 6 Creating a Publication |
| Project 8 Making a Movie |
| Adding Information to a Cell |
| Using Formulas |
| Formattin the Spreadsheet |
| Project 3 Excel Spreadshett |
| Starting PowerPoint |
| Adding New Slides |
| Adding Content to a Slide |
| Slide Transitions |
| Animating Slide Content |
| Introduction to Publisher |
| Working with Word Art |
| Creating Text Boxes |
| Inserting Images |
| WindowsMovieMaker |
| CIS 114 Calendar |
| Basic Pacasa Manual |
| Class Projects |
| Working with Folders |
| Renaming a File |
| Copying and Moving Picture Files |
| Organizing Pictures |
| Cropping PIctures |
| Lesson 1 Introduction to Web Plus X5 |
| Lesson 2 Working with Text |
| Lesson 3 Images |
| Lesson 4 Hyperlinks |
| Lesson 5 Final Project |
| Saving and Opening Documents |
| Using the D2L Dropbox System |
| Introduction to WebPlus X6 |
| Setting Up For Publishing |
| Publishing Your Web Site |
| Creating a New Web Site |
| Working With Text |
| Project 2 Text |
| Sample Text Page |
| Saving Image from a Web Page |
| Saving Images from a Image Search |
| Project 3 Images |
| Image Sample Page |
| Project 4 Navigation |
| Hyperlink Example Home Page |
| External Web Pages |
| Personal Photos |
| Contacting Me |
| Adding a Navigation Bar |
| Adding Pages to a Nav Bar |
| CIS 221 Day Calendar |
| CIS 221 Night Calendar |
| Accessing the D2L System |
| Using the D2L Dropbox System |
| Using the Snipping Tool |
| Lesson 1 Introduction to Web Plus X5 |
| Lesson 2 Working with Text |
| Lesson 3 Images |
| Lesson 4 Hyperlinks |
| Lesson 5 Final Project |
| Saving and Opening Documents |
| Using the D2L Dropbox System |
| Introduction to WebPlus X6 |
| Setting Up For Publishing |
| Publishing Your Web Site |
| Creating a New Web Site |
| Working With Text |
| Project 2 Text |
| Sample Text Page |
| Saving Image from a Web Page |
| Saving Images from a Image Search |
| Project 3 Images |
| Image Sample Page |
| Project 4 Navigation |
| Hyperlink Example Home Page |
| External Web Pages |
| Personal Photos |
| Contacting Me |
| Adding a Navigation Bar |
| Adding Pages to a Nav Bar |