
To begin this tutorial on adding navigation bars to a web site open the site you created in Project 4. We will add a navigation bar at the top of the page to navigate to each of the pages you created.
Once you have opened Project 4 do the following;
1. With the project 4 home page showing go to the Zoom Percent box and click on the arrow.
2. From the list that appears select Full Page.
3. Select all for the contents on the home page except for the page heading and the links at the top of the page. You can do this by drawing a box around all of the object on the page. See the image below.
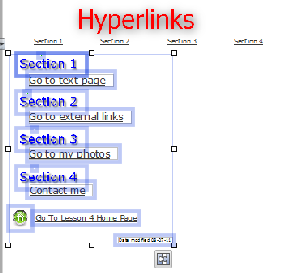
4. Move all of the objects selected down creating enough space to create a navigation bar.
5. Go back to the zoom box, click on the down arrow and select Page Width.
6. Place the arrow in the blank space you just created.
7. Click on the down arrow next to the Insert Navigation Bar tool.
8. From the list that appears select Insert Navigation Bar.
9. In the Type tab expand Traditional and select Traditional 2. A navigation bar will appear similar to the one below.
Note that the exclamation point appears indicating that you need to enlarge the navigation bar to see all of the pages in the site.
10. Instead of expanding the size double click on the navigation bar.
11. Select the Appearance tab, check the box in front of Wrap buttons and click OK.
When the page appears you will not that the exclamation point is still there.
12 Select the navigation bar.
13 Move the pointer over the handle in the middle of the lower line of the box around the navigation bar. A double headed arrow appears.
14. Drag the box down about double the distance of the original box and release the left mouse button. Any additional page buttons should appear and the exclamation point will disappear. If the exclamation point does not disappear drag the handle down further.
The navigation bar should look similar to the one below.

15. Click on the arrow next to the Preview Site button and select Preview in Window at the top of the list that appears. Try the links. When finished close the Preview window.
Note that only the home page has the navigation bar on it. To return to the home page you will have to copy and paste the navigation bar on to the other pages.
Copying and Pasting the Navigation Bar
To copy and paste the navigation bar on to the other pages in your site do the following;
1. On the home page select the navigation bar by clicking on the boarder. Make sure the boarder turns dark.
2. Right click on the dark boarder and select copy.
3. From the Site tab select your text sample page by double clicking on it.
4. Go to the Zoom Percent box and click on the arrow.
5. From the list that appears select Full Page.
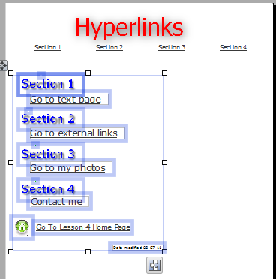
6. Select all for the contents on the home page except for the page heading. You can do this by drawing a box around all of the object on the page. See the image below.
7. Move all of the objects selected down creating enough space to create a navigation bar.
8. Go back to the zoom box, click on the down arrow and select Page Width.
9. Place the arrow in the blank space you just created and right click.
10. From the list that appears select Paste.
11. The navigation bar will appear on the page, you need to move it so that it is in the space you create.
Note that the current page you are on is colored in the navigation bar.
12. Repeat the above steps to to add the navigation bar to the other pages in your site.
13. Click on the arrow next to the Preview Site button and select Preview in Window at the top of the list that appears. When Finished close the preview window.
Leave the site open for the next section Adding Pages to a Nav Bar Site
Date modified 08-