
To add text to a slide you click to add or paste the information and then click somewhere outside of the text box.
On some slides you will work with bulleted lists.
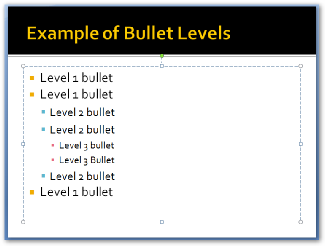
The slide at the left shows an example of three levels of bullets. Notice that as you move from a level 1 to a level 2 the text gets smaller and the same from level 3 to level 3.
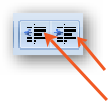
To change the list level you use the
increase
or decrease
list level buttons found on the Home toolbar.
On may slides you will see six buttons, these buttons are for adding various types of content to the area they are found in.
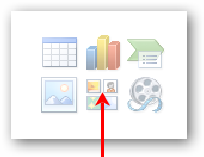
Insert Table
Insert Chart
Insert SmartArt Graphics
Insert Pictures from File
Clip Art
Insert Media Clip
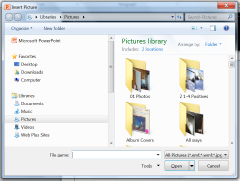
When you click on the Insert Picture from File button the Insert Picture dialog box
will open. Brows to the folder your pictures are located in and select the one you
want to insert. 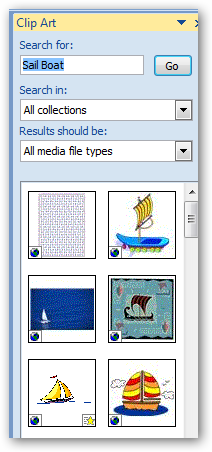
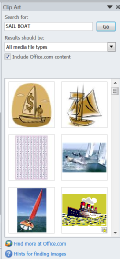
When you click on the Clip Art button a Clip Art search box will appear on the right side of the PowerPoint work area. You type a key word search in the Search for box and click on go. If there are any matches, the images will appear.
To add a clip art image, click on the image and it will appear in the slide.
For the PowerPoint project you will be required to add only pictures and/or clip art. If you wish to add other object you can.
Date modified 12-
| CIS 112 Home Page |
| CIS 114 Home Page |
| CIS 147 Home Page |
| CIs 215 Home Page |
| CIS 221 Home Page |
| CIS 230 Home Page |
| CIS 112 Class Calendar |
| Using the D2L Dropbox System |
| Educational Goals and Objectives |
| Projects |
| Using the D2L System |
| Project 3 Excel |
| Project 4 Working with Images |
| Project 5 Creating a Slide Presentation |
| Project 6 Creating a Publication |
| Project 8 Making a Movie |
| Adding Information to a Cell |
| Using Formulas |
| Formattin the Spreadsheet |
| Project 3 Excel Spreadshett |
| Introduction to Publisher |
| Working with Word Art |
| Creating Text Boxes |
| Inserting Images |
| WindowsMovieMaker |
| CIS 114 Calendar |
| Basic Pacasa Manual |
| Class Projects |
| Working with Folders |
| Renaming a File |
| Copying and Moving Picture Files |
| Organizing Pictures |
| Cropping PIctures |
| Lesson 1 Introduction to Web Plus X6 |
| Lesson 2 Working with Text |
| Lesson 3 Images |
| Lesson 4 Hyperlinks |
| Lesson 5 Final Project |
| Saving and Opening Documents |
| Using the D2L Dropbox System |
| Introduction to WebPlus X6 |
| Setting Up For Publishing |
| Publishing Your Web Site |
| Creating a New Web Site |
| Working With Text |
| Project 2 Text |
| Sample Text Page |
| Saving Image from a Web Page |
| Saving Images from a Image Search |
| Project 3 Images |
| Image Sample Page |
| Project 4 Navigation |
| Hyperlink Example Home Page |
| External Web Pages |
| Personal Photos |
| Contacting Me |
| Lesson 1 Digital Data |
| Lesson 2 Text |
| Lesson 3 Graphics |
| Lesson 4 Sound |
| Lesson 5 Video |
| Sample Text Page |
| CIS 221 Day Calendar |
| Accessing the D2L System |
| Using the D2L Dropbox System |
| Using the Snipping Tool |
| CIS 230 Day Class Calendar |