
Animation can add interest and help emphasize points in your PowerPoint presentation. The Animation tab is used to add animations to the content of your slides.
To start click on the animation tab, notice that all of the animations are grayed out.

Remember you are animation the content on a slide so you must select the content before you can animate it. When you select the content the animation tab will become active an you can now add animation to the content you have selected.


On the left side of the Animation tab are the animations. On the right side of the animations area is a
up arrow
down arrow
and more
There are four types of transitions that can be applied to an content of a slide;
- Entrance
- Emphasis
- Exit
- Motion Path
Notice that below the types of transitions are link to see attritional transitions for each type.
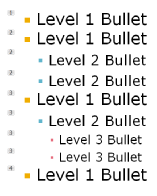
In the example at the left I have animated a bullet list. Note that the second and third level bullets will appear with the first level bullets just above them. This may be the way you want the presentation to go. However you may want to animate each bullet separately, to do this follow the directions below.
In the tool bar click on the Animation Pane button.
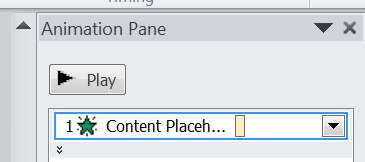
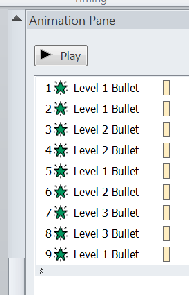
On the right side of the PowerPoint window the Animation Pane opens. In the pane you will see the number 1 with a star and a double down arrow just below it.
Click on the double down arrow and all of the content will appear in its own box.
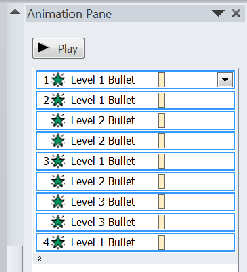
Notice that the level 2 and 3 bullets do not have a number after them. This means that they will appear with the bullets with the number above them. Also notice that the text appears in the box.
To make the appear separately select the level bullet, when you do this an arrow will appear on the right side of the box.
Click on that box and a menu will open. From the menu that appears select Start on Click. When you do this a number will be added to the text. This indicates that this text will enter seperatly.
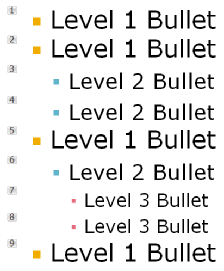
When you have completed this process you will see that the all of your bullets have separate numbers that correspond to the information displayed in the Animation Pane.
When you play the slide the bulleted text will appear in that order.
This is by no means a complete explanation of how PowerPoint is used to present instruction in the classroom. You must play with this software to see what it really can do to produce interesting and exciting classroom materials.
Date modified 12-
| CIS 112 Home Page |
| CIS 114 Home Page |
| CIS 147 Home Page |
| CIs 215 Home Page |
| CIS 221 Home Page |
| CIS 230 Home Page |
| CIS 112 Class Calendar |
| Using the D2L Dropbox System |
| Educational Goals and Objectives |
| Projects |
| Using the D2L System |
| Project 3 Excel |
| Project 4 Working with Images |
| Project 5 Creating a Slide Presentation |
| Project 6 Creating a Publication |
| Project 8 Making a Movie |
| Adding Information to a Cell |
| Using Formulas |
| Formattin the Spreadsheet |
| Project 3 Excel Spreadshett |
| Introduction to Publisher |
| Working with Word Art |
| Creating Text Boxes |
| Inserting Images |
| WindowsMovieMaker |
| CIS 114 Calendar |
| Basic Pacasa Manual |
| Class Projects |
| Working with Folders |
| Renaming a File |
| Copying and Moving Picture Files |
| Organizing Pictures |
| Cropping PIctures |
| Lesson 1 Introduction to Web Plus X6 |
| Lesson 2 Working with Text |
| Lesson 3 Images |
| Lesson 4 Hyperlinks |
| Lesson 5 Final Project |
| Saving and Opening Documents |
| Using the D2L Dropbox System |
| Introduction to WebPlus X6 |
| Setting Up For Publishing |
| Publishing Your Web Site |
| Creating a New Web Site |
| Working With Text |
| Project 2 Text |
| Sample Text Page |
| Saving Image from a Web Page |
| Saving Images from a Image Search |
| Project 3 Images |
| Image Sample Page |
| Project 4 Navigation |
| Hyperlink Example Home Page |
| External Web Pages |
| Personal Photos |
| Contacting Me |
| Lesson 1 Digital Data |
| Lesson 2 Text |
| Lesson 3 Graphics |
| Lesson 4 Sound |
| Lesson 5 Video |
| Sample Text Page |
| CIS 221 Day Calendar |
| Accessing the D2L System |
| Using the D2L Dropbox System |
| Using the Snipping Tool |
| CIS 230 Day Class Calendar |