| CIS 147 Lesson 2 Project 4 Part 3: Creating Text Pages |
Note:
As you go through this project, if you have any questions please e-mail me.
Also refer to parts 1 and 2 if you have forgotten how to make and save new pages or create links between pages.
You can at anytime upload pages to the site for me to look at and make comments before you indicate to me that you have completed the project for grading.
In this the last part of project 4, you will create three more text web pages. The title and file name for the additional pages will be:
| Page name | file name |
| Type Page 2 | typepage2 |
| Type Page 3 | typepage3 |
| Type Page 4 | typepage4 |
Design Requirements for Each Page
Type Page 1 (this page is already created
I would like a design that uses type to emphasize the fact that this page has the links to all of the other pages that make up Project 4.
Type Page 2
This page should show good design concepts for headings, sub-headings and body text.
Type Page 3
This page should show good design in the use of indented text, heading and sub-headings
Type Page 4
This page should show an effective use of a reverse text page. A page where the background is dark and the text is light.
Raw text can come from other web pages that already exits but the design must be your own.
The pages will be linked together as follows
| A link from the Home Page (index.htm) to Type Page 1 (typepage1.htm) |
| A link from Type Page 1 (typepage1.html) to Type Page 2 (typepage3.htm) |
| A link from Type Page 1 (typepage1.html) to Type Page 3 (typepage3.htm) |
| A link from Type Page 1 (typepage1.html) to Type Page 4 (typepage4.htm) |
| A link form Type Page 2 (typepage2.html) to Type Page 1 (typepage1.html) |
| A link form Type Page 3 (typepage3.html) to Type Page 1 (typepage1.html) |
| A link form Type Page 4 (typepage4.html) to Type Page 1 (typepage1.html) |
| A link from Type Page 1 (typepage1.html) to the Home Page (index.htm) |
| A link form Type Page 2 (typepage2.html) to the Home Page (index.htm) |
| A link form Type Page 3 (typepage3.html) to the Home Page (index.htm) |
| A link form Type Page 4 (typepage4.html) to the Home Page (index.htm) |
You might want to make a diagram of the above linking before you start the actual process of linking the pages.
Formatting Text
Nvu has an area that explains how to format text on a Web page. You can access this information in users guide by clicking on the link below.
http://nvudev.com/guide/html/ugs03.htm#s34
Although there is good information at the above address, You will find additional diagrams and explanations below to help you complete this part of the project.
The images below are a detailed diagram of the parts of the Format Toolbars. I have only identified the parts of the tool bars that you will use in formatting, positioning and coloring text.
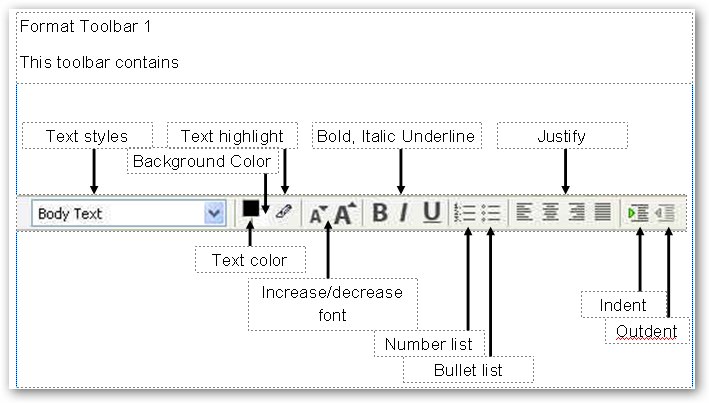
One thing you have to be careful of in this tool bar is the two buttons the control the text color and the background color.

The top button is for adding color to selected text. The bottom button is to put a background behind the selected text. To set or preset color selections for a page see the section Setting Page Colors and Backgrounds below.
To add color to text, select the text and press on the top button, the following dialog box will appear;
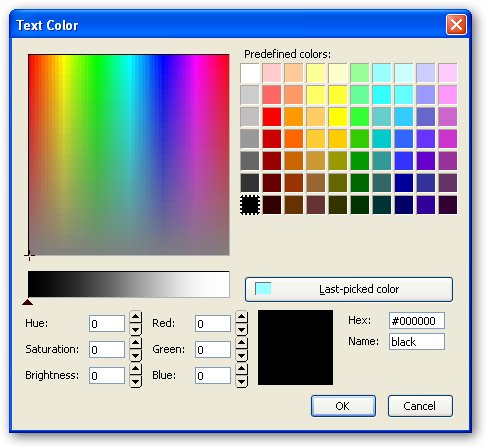
You can select from the Predefined colors or if you know how to you can use the lower half to create you own colors. At this stage it is better to use the Predefined colors.
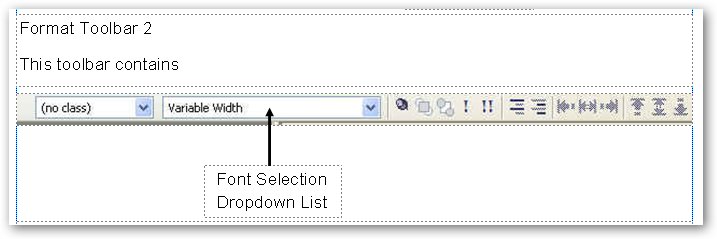
Note that in Formatting Toolbar 2 there is only on box that you will use. This is the box that allows you to pick the style of text you want to use.
Selecting Text Styles
When you click on the arrow next to the Text styles box the following list will appear.
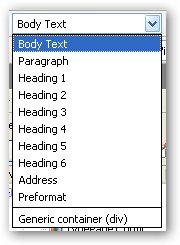
Paragraph is the most appropriate for general text. Once formatted as a paragraph, when typing in a text area, use of the ‘enter’ key starts a new block of text i.e. a paragraph. To start a new line within the current paragraph press Shift+Enter; this generates a line break.
The Headings 1 - 6 allow you to increase or decrease the size of the text from the body style. The largest text size is 1 and the smallest text size is 6.
Selecting Font Styles
When you click on the down arrow next to the Font Selection Dropdown List you will see the following;
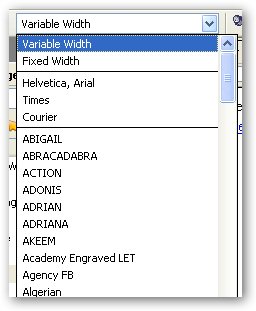
In the font selection dropdown list notice that there are three font styles between two lines. These are the fonts that all operating systems have. It is a good idea to use one of these three on any web pages you create.
You can choose other fonts but you take the chance that the person’s computer receiving your Web pages my not have that font. The Web browser will use the default font usually New Times Roman to render all of the fonts on your page.
Setting Page Colors and Backgrounds
To set page colors and backgrounds you will use the Page Colors and Backgrounds dialog box.
To access this dialog box click on the Format menu and select Page Colors and Backgrounds. You will see the following dialog box.
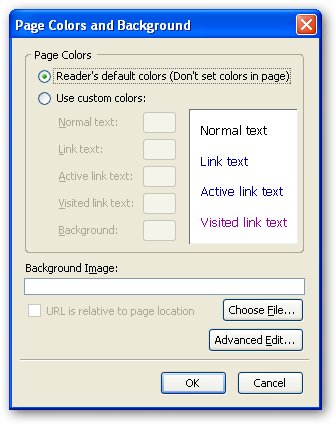
You can use this box to select all of the colors for the page before you begin to actually enter text on the page, or you can make changes during or after you have completed a page.
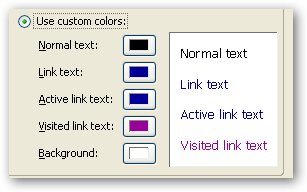
To set custom colors select Use Custom Colors, the area of the dialog box will look like the image below.
To change the colors of any of the items click on the color chip next to that item the following dialog box will appear.
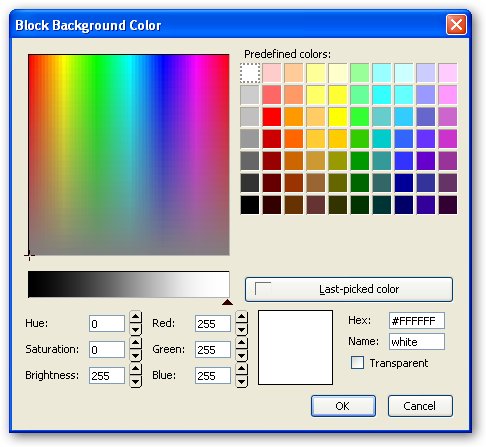
Note that at the top of the dialog box it indicates what part of the page you are changing. You can select from the Predefined colors or if you know how to you can use the lower half to create you own colors. At this stage it is better to use the Predefined colors.
In the next lesson you will learn how to add a background image to your Web page.
When you have finished and published all of the pages send an e-mail me to grade Project 4. The subject for the e-mail should be Finished Project 4 (your name).
![]() Return to Home Page
Return to Home Page