| CIS 147 Lesson 2 Project 4 Part 2: Creating Additional Pages and Links in XP |
In the part of Project 4 you will create an additional page and create a link to that page from the home page.
Creating a New Web Page and Saving It To A New Folder
1. Start Nvu, a new untitled Web page should be in the window.
2. Click on the Save button
3. In the Page Title dialog box enter Type Page 1. press OK
4. In the Save Page As dialog box click on New Folder.
5. In the New Folder box type WebPages.
6. Open the WebPages folder.
7. In the File Name box enter TypePage1(note that this is the file name and has no spaces between the words).
8. Click on the + in front of CIS 147 Web Site. You should see the new folder WebPages (if you see a – in front of the CIS 147 Web Site, click on the – and the + to see the new folder)
9. Click on the + in front of WebPages and you will see the file TypePage1.html.
10. In the main Nvu window in the box that has Body Text in it click on the down arrow and select Paragraph.
11. In the box that has Variable Width in it click on the down arrow and select Helvetica, Arial
12. On the web page type This is the first text page, click on the save button.
It is important to save all text added to a page before doing any other process such as adding links or graphic to the page.
Creating the Remote Directory and Publishing The TypePage1 File
1. In the Nvu Site Manager Select the CIS 147 Remote Web Site
2. Click on New Folder button
3. In the Create a new directory dialog box type WebPages (this must exactly match the name for the folder you created in the CIS 147 Web Site), press OK.
4. If the Publish button is not active click on the Save button again.
5. If the Save Page As dialog box appears make sure you are in the WebPages folder, chick on Save and in the next dialog box click Yes.
6. Click on the Publish button.
7. In the Site Name box select CIS 147 Remote Site
8. In the Site Subdirectory for this page type WebPages,
9. Press the Publish button. You should see the dialog box that indicates Publishing Complete. Press the Close button.
Notice that the Web page TypePage1 is now in the folder WebPages on the remote site. If you do not see the file in the WebPages folder click on the + in front of the folder. Also notice that the structure of the CIS 147 Remote Site and CIS 147 Web Site are identical.
Creating Links Between Web Pages.
1. In the Nvu Site Manager double click on Index.html under CIS 147 Web Site, the index page should open with the tab Home page for your name.
2. After the first line of text press the Enter key and on the new line type Click here to go to the first text page.
3. Save the page.
4. Highlight the words Click here.
5. Click on the Link button, the following dialog box will appear.
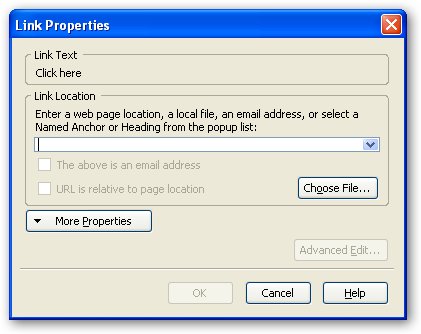
6. In the Link Properties dialog box press the Choose File button, the following dialog box will open.
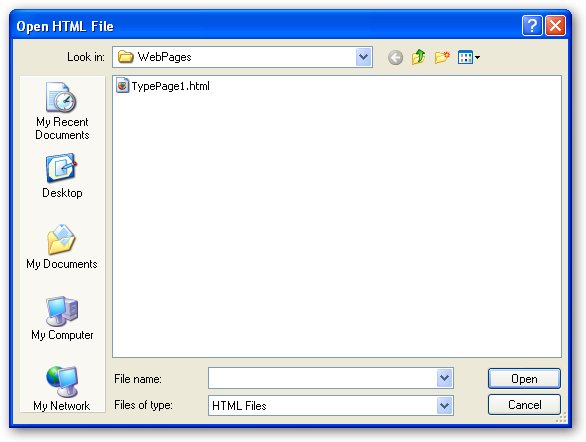
7. If the WebPages folder is not already open, double click on the WebPages Folder.
8. Click on TypePage1 to select it and press the Open button, the Link Properties dialog box will open.
Special Note: In the Link Location box you should see WebPages/TypePage1.html. If you see something like file///C:/WebSit/WebPages/TypePage1.html you have not saved the web page before you created the link. This link will work when you test it locally but will not work when you transfer the file to the remote site. To correct this you must start the process of creating the link over and save the file before you create the link.
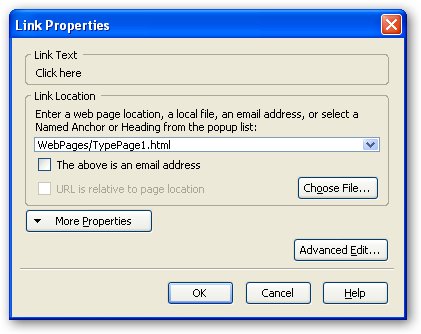
9. Press OK on the Link Properties dialog box.
10. Save the Page.
11. Click somewhere else on the page and note that the words Click here are now a link.
12. To test this link click on the Browse button, the following dialog box will appear and when Launch Application becomes active press this button.
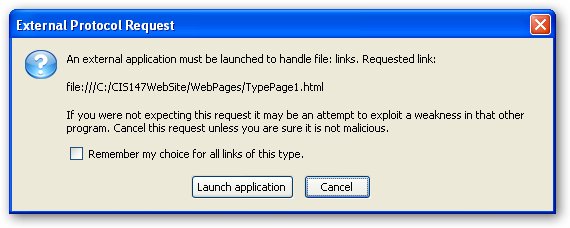
13. When the browser starts click on the link to test that it opens TypePage1.html.
14. Close the application window.
15. Click on the Publish button.
16. Make sure that Home Page for your name is selected.
17. Select CIS 147 Remote Site in the Site name box
18. If there is anything in the Site subdirectory of the page box delete it and push the Publish button.
19. Go to your Web site and test this link.
Completing Part 2 of Project 4
To complete this project create a link in the Type Page 1 page back to the home page.
Remember the following;
Make sure that you save the page after you create the text but before you create the link.
Test the link before you publish the page by clicking on the Browse button.
When you publish the page make sure that in the Site subdirectory of the page box you type WebPages.
You may notice that two TypePage1.html may appear in the in the WebPages folder on the Remote Web Site. If you click on the – and then the + on of them will disappear.
Test the two links in a Web browser.
When you have completed this part of Project 4 e-mail me to check it before you proceed to the next part of this lesson. The subject for the e-mail should be Finished Project 4 Part 2(your name).
![]() Return to Home Page
Return to Home Page