| CIS 147 Lesson 3 Project 6 Part 1: Downloading Graphics |
Graphics add a visual element that can greatly enhance the appeal of your Web page and site. Acquiring graphics and placing them on a Web page is a relatively simple process, creating a pleasing arrangement of graphics and text takes planning. In this part of the project you will learn how to download graphics from the web.
Before you begin the project, a change in how FireFox works has to be made. Follow the steps below to change how files are downloaded and saved.
1. Open FireFox.
2. From the Tools menu select Options. The following dialog box will appear.
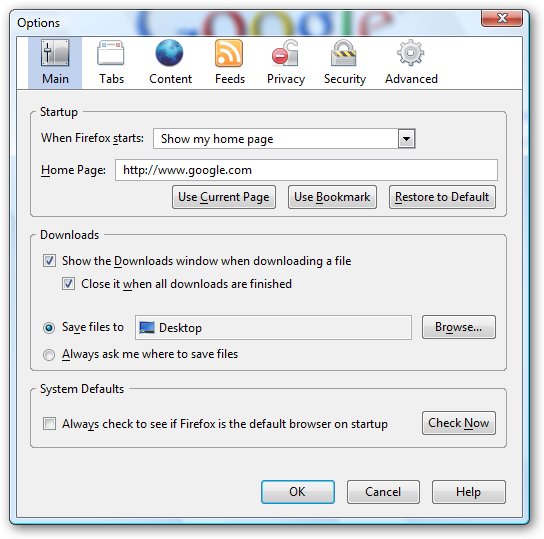
3. Select “Always as me where to save files” in the dialog box and click OK.
Obtaining Graphics from the Internet
There are a number of web sites where you can obtain graphics that you can use on Web pages. Many search engines have the ability to search for images. We will use Google as and example of how to find and download images from a search engine that you can use on your Web pages.
When you go to Google as www.google.com (remember we are using the FIreFox browser) on the home page you will see a link that allows you to search for images.
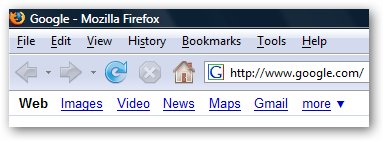
When you click on the image link, Google will change to key word searches for images.

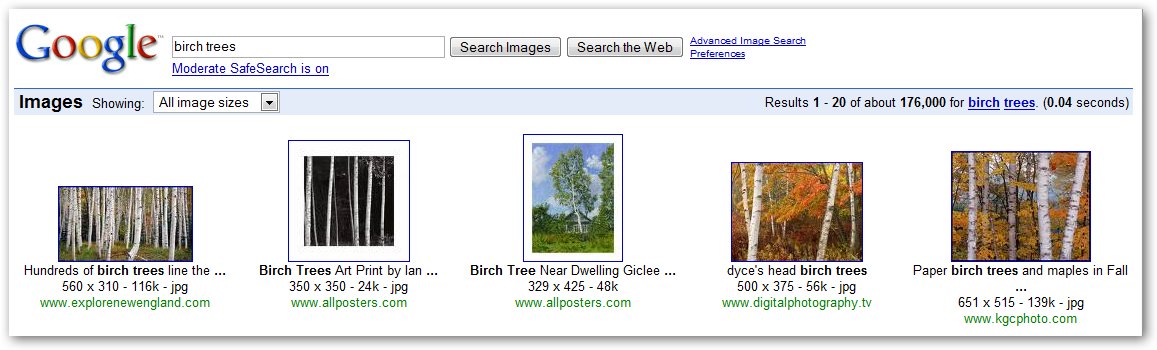
When you do a search of images, Google will display thumbnails of the images it has found that match your search. A thumbnail is a small version of the full size image.
To see the image you click on the thumbnail, the following Web page will open.

Sometimes you will see the actual image on the same page sometime the image will not appear.
You should click on “See full size Image”. The image will appear on a Web Page by itself.
To download and save the image, right click on the enlarged image. The following dialog box will appear.

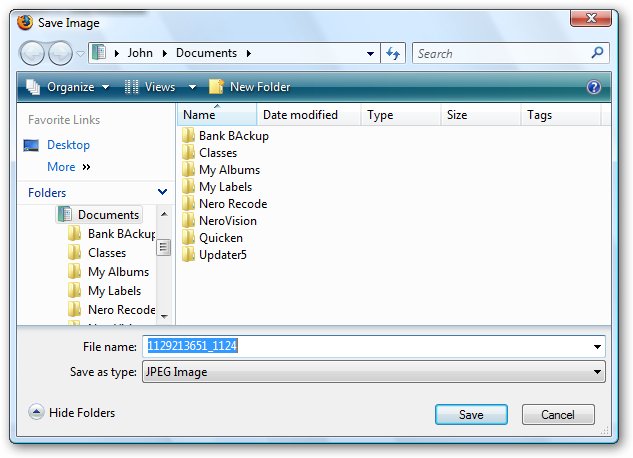
From this list click on Save Image As…(If you use a different browser the Save Image As… command may be worded different.) you will see the following the Save Image Dialog box.
Navigate to the folder for your web site, in this case it is the CIS147WebSite folder on the C: drive of your computer.
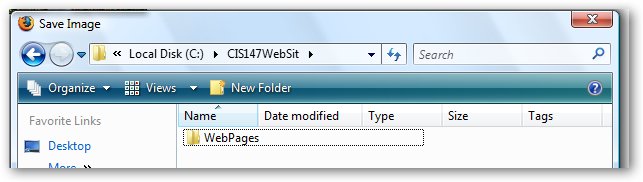
The first time you save a graphic to your Web site you should create a separate folder for all graphics used on your web site. This will help you more easily find the graphics later. To create the new folder do the following;
1. Click on the New Folder button
2. Replace the words New Folder with Graphics
3. Click in the box next to File Name and change the name if necessary to something that makes more sense (sometime the name for the file on the internet does not match the graphic you are downloading)
4. Click on Save.
The graphic will be save to the Graphic folder in your CIS147WebSite folder.
All graphics and images you use on your Web site must be placed in this folder.
There are Web sites that provide free images such as buttons, backgrounds and images that work slightly different in how images are downloaded.
We will use Iconbazaar as and example of this type of web site. Iconbazaar is found at;
When you go to this site you will be greeted with a number of pop-ups, just close them.
On the home page you will see icons indicating the major categories of images you can access and download.
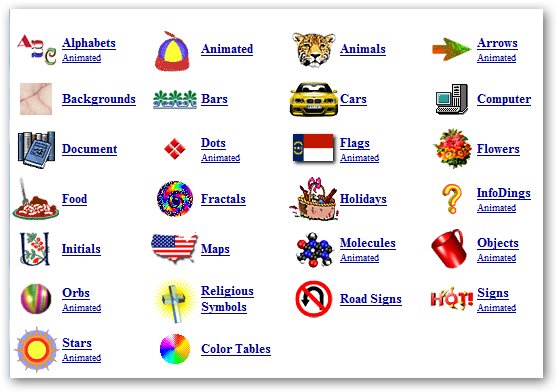
Note that some of the categories have the word animated, this indicates that these are animated GIF files, we will explain latter how to download animated GIF files.
If you click on a category like Road Signs you will see the following Web page;
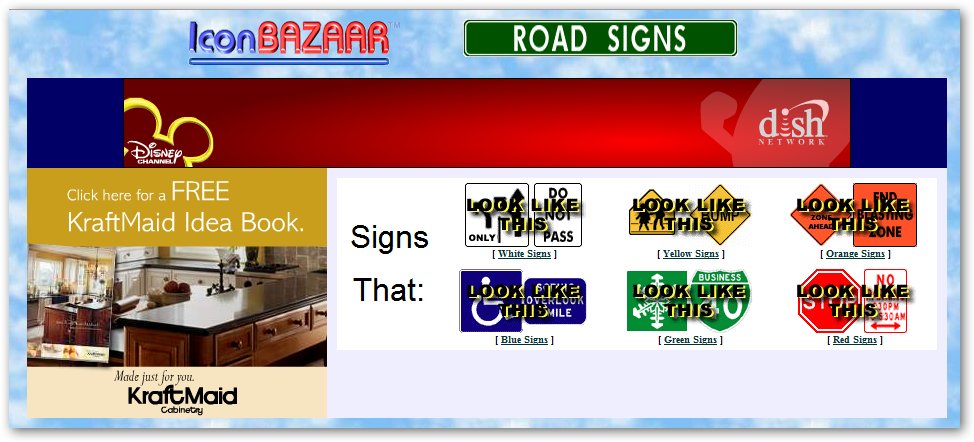
Clicking on one of the categories will take you to a page where you will find the signs.
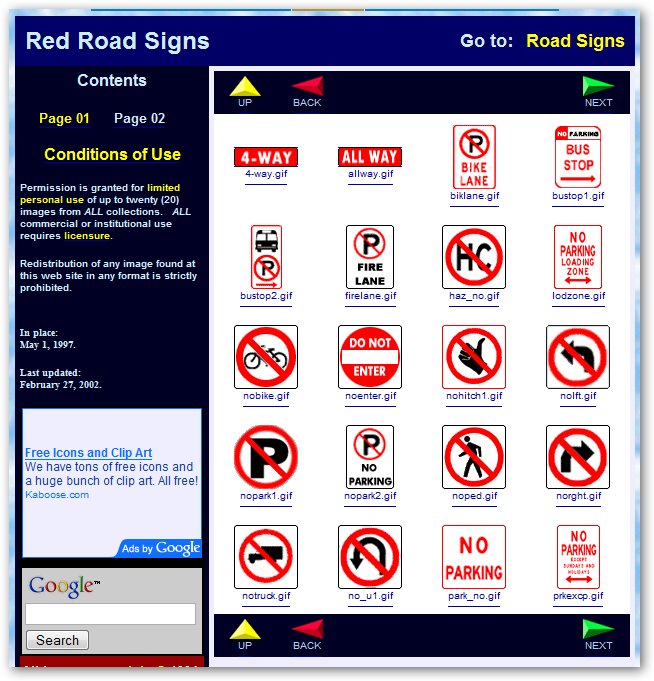
From this page you can look at all of the signs available and download the sign you want by
1. Right clicking on the image and from the list that appears select “Save Image As…”
2. In the Save Image dialog box make sure you are in the Graphics folder.
3. Change the name of the image if you need to.
4. And click Save.
Downloading and Animated GIF.
The only difference between downloading and saving a image and an animated GIF is that the animated GIF must be running. While the animated GIF is running, right click on the image and select “Save Image As..”. and save it in the same way you did with a still image. My should always indicate in the file name that this is an animated GIF.
One of the best ways to fine Web sites that provide free graphic you can use is to do a search on the Web using key words such as Free Web Graphics or Free Clip Art.
Notes on Using Images found on the WWW.
Copyright is always an issue when you use and image on your web site that you have copies from a Web site. They may say it is free clip art or image, but you need to read the terms and conditions of use before you place them on your Web site. Do not use recognizable image such as Mickey Mouse or the Simpsons these images are copyrighted and you have to pay to use them on any web site.
For this class you do not have to worry about usage issues.
Images you fined in Searches on search engines such as Google may or may not be available for public use. Be very careful when you use and image for this source, try to determine what the rules are governing the use of the image before you use it.
The best way to make sure that you can use image on your Web pages is to create your own. There are a number of Web sites on which you can create your own buttons, banners and other types of images. I have listed a number of them below. Each of the provides direction on how to use their web site to create your own custom images. Before you use and of the Web sites listed below or any where on this page understand the neither the school nor I endorse these Web sites, you can use them but we are not responsible for any adverse results from there use.
http://www.customsigngenerator.com/
http://www.1netcentral.com/graphics-tools.html
To complete part 1, I would like you to download a number of graphics to the Graphics folder in your web site. Download the following;
A number of page backgrounds
A number of arrows (back, home etc)
A number of bars
You will use these images in Part 2 of this project.
![]() Return to Home Page
Return to Home Page